CNAME or Canonical Name record is a resource record in DNS that provides an alias for another domain.
For instance, suppose a domain name such as ‘blog.xyz.com’ has a CNAME record with the value of ‘xyx.com’. This would mean that when a DNS server hits the DNS records for ‘blog.xyz.com’, it would trigger another DNS lookup to ‘xyz.com’ and the IP address of ‘xyz.com’ would be returned through it’s A record. In this case, ‘xyz.com’ would be referred to as the Canonical Name or CNAME of ‘blog.xyz.com’.
Usually, when websites have subdomains, such as ‘shop.xyz.com’ or ‘blog.xyz.com’, these domains have CNAME records that point to the root domain ‘xyz.com’.
To put it precisely, CNAME records make is simpler and easier for you to run multiple services from a single IP address.
If you want to change or add the CNAME record for the SSL verification of specific domain name, you can do that by following the steps below:
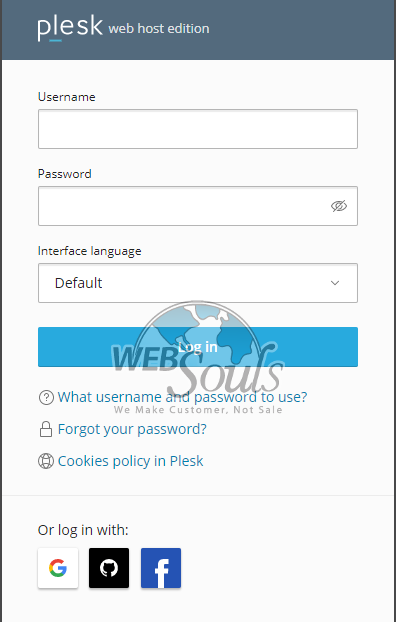
Step 1: Login to Your Plesk Panel
First of all, before you begin the process, you’d have to login to your Plesk account. Simply enter the required credentials and Login!
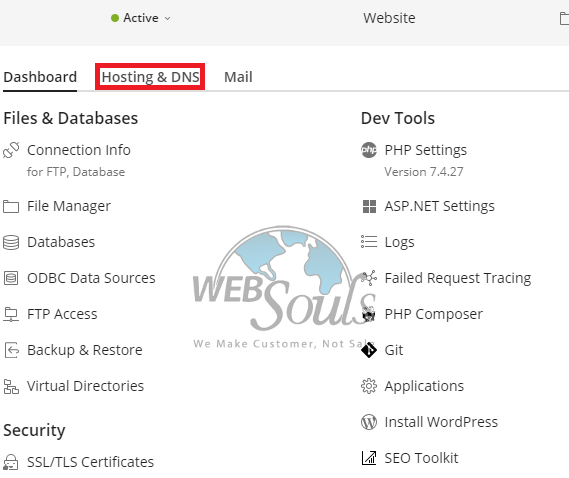
Step 2: Select “Hosting and DNS” Option
Once you’re logged in, select the “Hosting and DNS” option from the menu bar.
Step 3: Click on “DNS Settings”
Now, click on the “DNS Settings” option to go to the settings and there you would be able to add a CNAME record as desired.

Step 4: Click on “Add Record” From the Menu Bar
Once you’re in the settings, click on the “Add Record” option available in the menu bar.

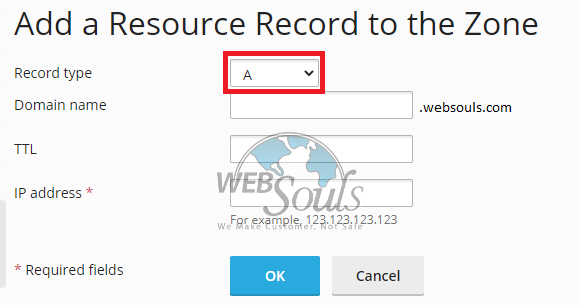
Step 5: Select the Record Type as CNAME
After clicking on “Add Record”, you’d be required to select a type of record. Since you wish to add a CNAME record, select CNAME from the dropdown menu.
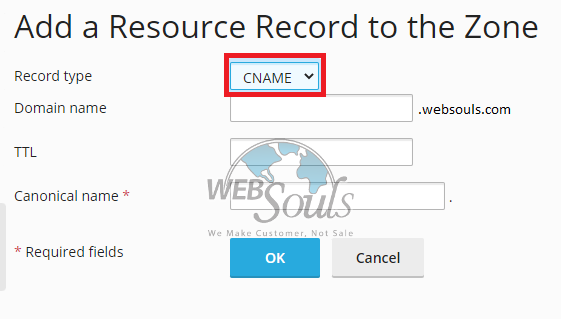
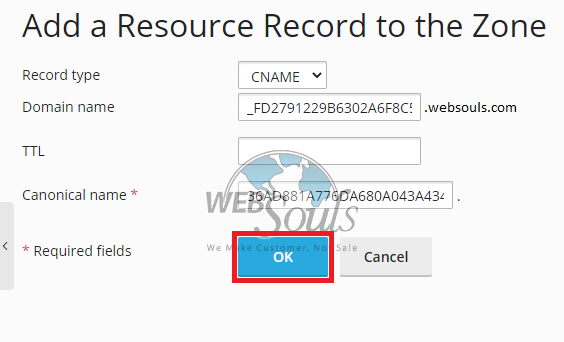
Step 6: Enter the Required Details and Click on “OK”
After selecting the record type, enter the details provided by your web hosting company in Pakistan and click on the “OK” button to proceed.

Step 7: Click on the “Update” Button
After the details have been added, you’d see a bar appear on the top of your screen. Click on the “Update” button in this bar in order to save the CNAME record that you just added/changed.

Step 8: The CNAME Record Would be Updated
All done!
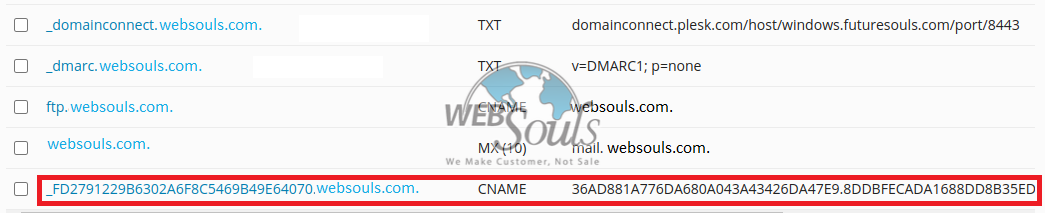
The CNAME record for your domain would now be updated.
Here’s how you’d be able to see the updated record in your Plesk account:
For more information, or in case of any confusion, you can always get in touch with our support team via the live chat option available on our website, or email at support@websouls.com.
We provide web hosting services in Pakistan, in addition to web development and SEO services.
