The host file is a crucial component of your computer's networking system that allows you to manually map domain names to specific IP addresses.
Editing the host file can be a useful skill for resolving domain names locally, especially when dealing with testing or development environments.
In this step-by-step guide, we will walk you through the process of editing the host file to resolve domains locally, ensuring that you have complete control over your network settings and can efficiently troubleshoot any DNS-related issues:
Step 1: Select Run as Administrator
Click "Start" and locate "Notepad." Right-click and select "Run as administrator."

Step 2: Click Open
Within the files section, navigate to the 'new window' option and select the 'open' function from the menu.

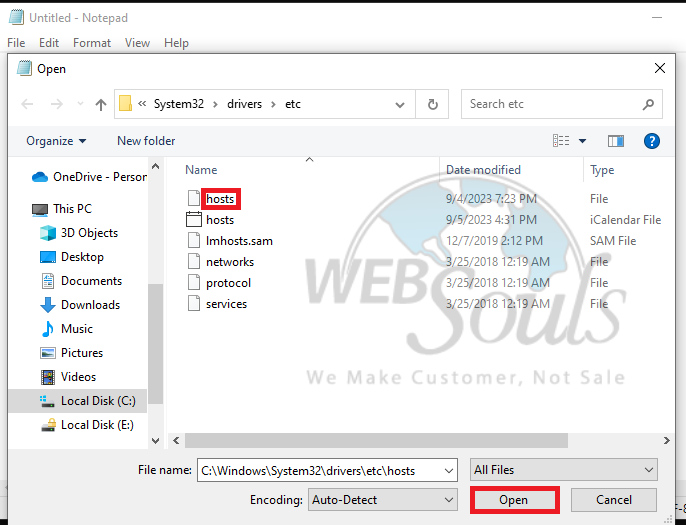
Step 3: Select the Hosts File
Now, navigate to C:\Windows\System32\Drivers\etc and be sure to select All Files to locate the host file effectively.
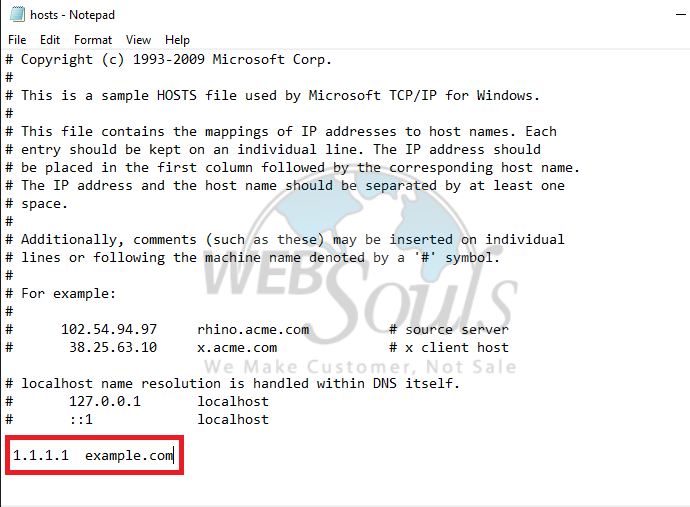
Step 4: Save Changes
You now have the ability to modify the hosts file. Insert the custom IP address you previously created, followed by a space, and then input your domain name. This image provides a visual guide to editing a host's file in Windows 10. Remember to save your modifications once you've completed the process.
All done!
In case of any confusion, you can contact our customer support executives via the live chat option available on our website. Or, simply visit us at one of our offices for web hosting in Lahore or Karachi.
