Google Search Console is an online free Google-based service for website owners. It keeps you aware of all the major insights about how your website is performing, which pages are ranking, and which keywords rank your website on search engines.
This easy and to-the-point tutorial will make it handy to verify your domain property with Google Search Console. The following visuals brief you about what Google Search Console is and why it is important.
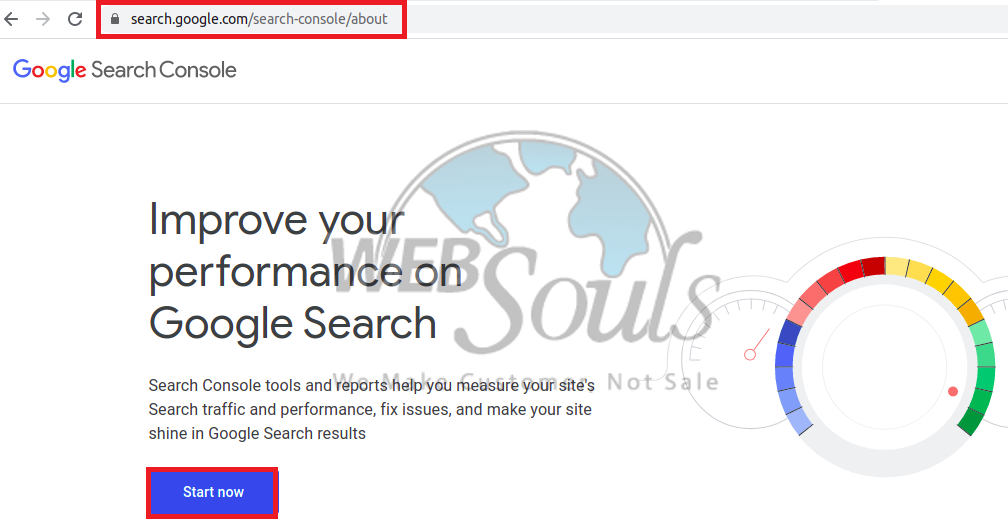
Step 1: Getting Started
Go to your web address, search Google Search Console and click on the icon “Start now” to getting started as seen in the visuals.
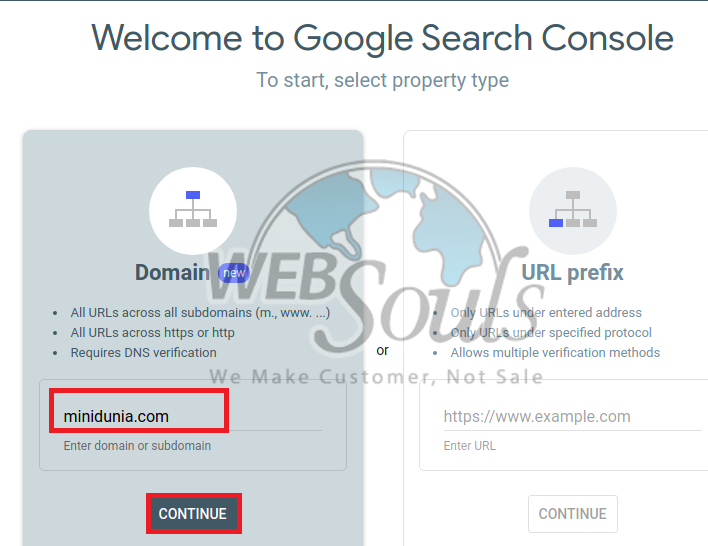
Step 2: Add property Under the Search
Once you click on the ‘start icon’, it redirects you to another interface. Add your domain property in the Domain search bar and click on the ‘continue’ icon to move further. Google Search Console allows you to add up to 1000 properties to your account.
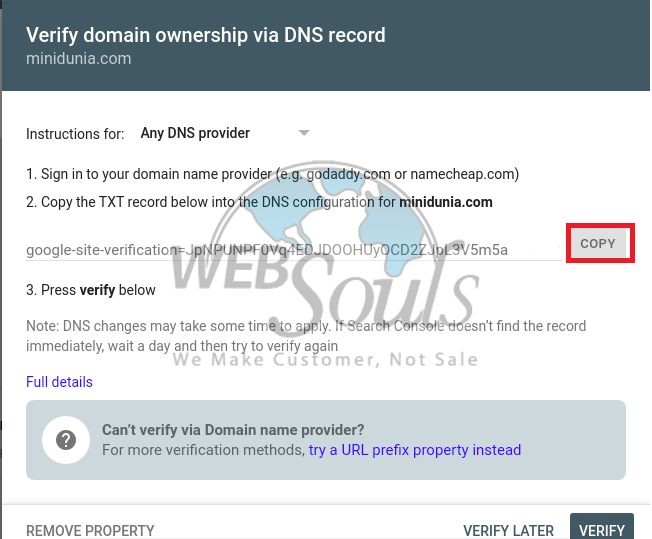
Step 3: Verification Step
Now you have added the property, follow the verification step. Another tab will open. Copy the domain verification TXT record you will receive there. Do not close the tab.
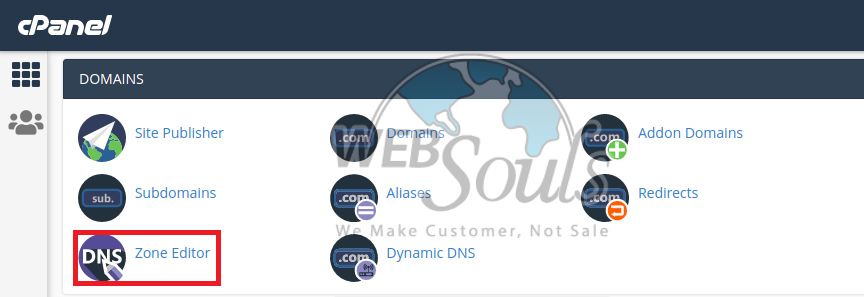
Step 4: Domain Login
Now open your WebSouls domain control panel. Here we will show you examples through cPanel. Get additional information about your hosting from here.
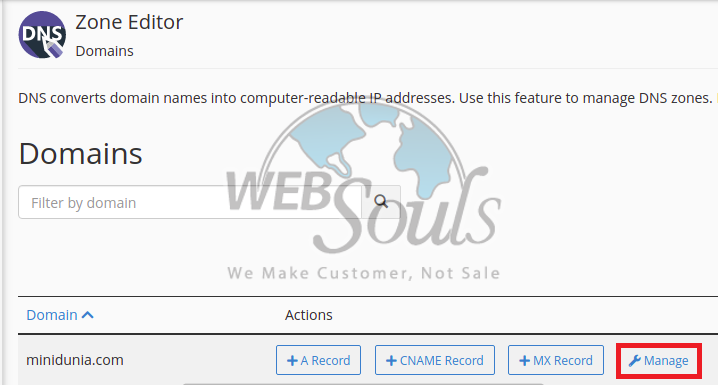
When the cPanel opens, you need to find Zone Editor under the domain. Click it and it will redirect you to another interface.
Step 5: Verification Process
Now choose the domain to verify in Google Search Console and click ‘Manage’. Now click on ‘A Record’ and it will again redirect you to another tab.
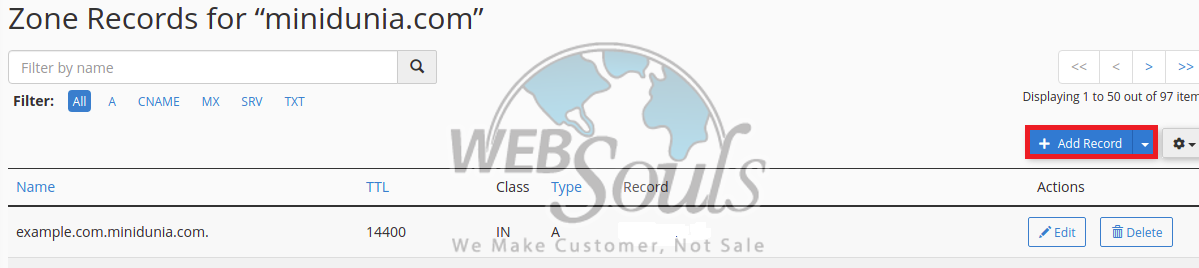
Step 6: Information You Need to Add
In the below section, you need to put your valid zone name which is – your domain name here. Put digits 14400 in the TTL section and your TXT verification text - copied text that we talked about in the verification process. When you’re done with putting information, click ‘Add Record and save it.
Check zone record for “minidunia.com”. Here is how it will appear on your tab after you have added the information.
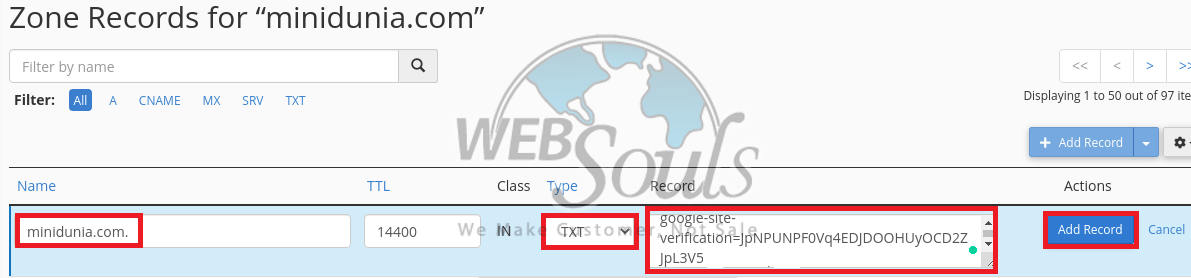
.
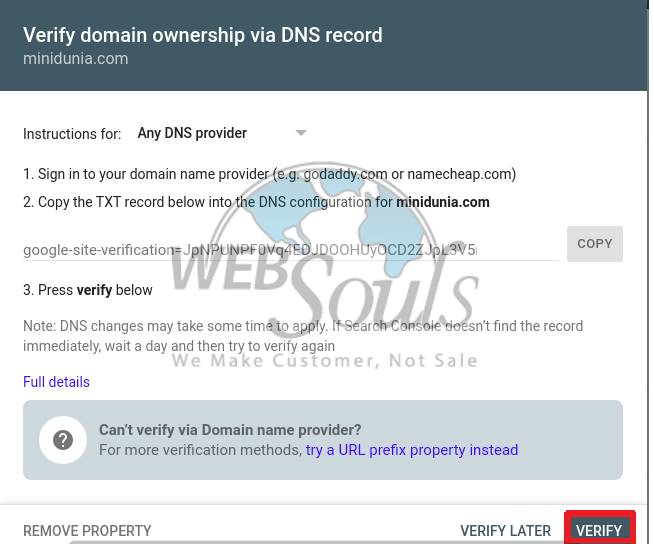
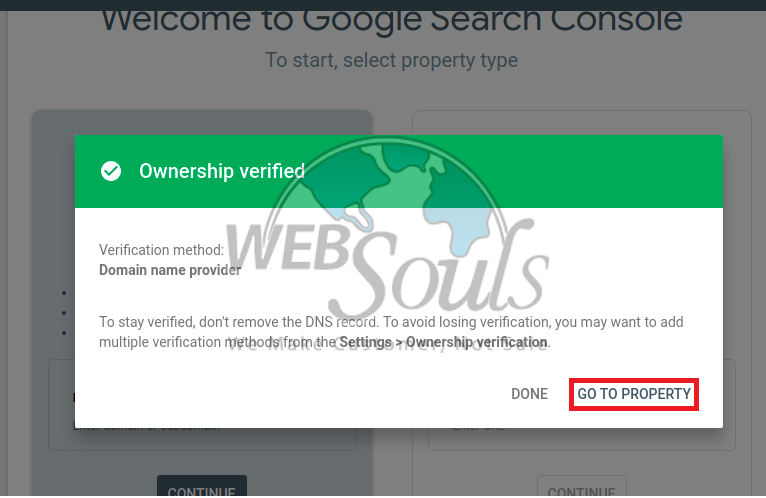
Step 7: Final Verification
Once you’re done with filling all the requirements, go back to Google Console and click verify. You will see another interface popped with ‘ownership verified’.
Once your ownership is verified, click “Go Back to Property” and it will take you back to your main page of Google Search Console.
You have put all the requirements and you’re back to your Google Search Console main page.

I hope this tutorial helped you to add your domain into Google Search Console. Still, if you any questions and need technical support, get in touch with our customer service though email, online chat.
We offer proactive support, provide website development in Pakistan, varieties of web hosting services; shared web hosting, VPS hosting, WordPress hosting, dedicated servers and domain registration in Pakistan.
