Managing your domain names effectively is essential for maintaining control over your online presence.
Auto-renewal can be convenient, but there are times when you may want to opt out of it.
Whether you're looking to switch registrars, avoid unexpected charges, or simply want more control over your domain renewals, this guide will walk you through the steps to disable auto-renewal from your client area.
We'll provide clear, step-by-step instructions to ensure you can confidently manage your domain settings with ease:
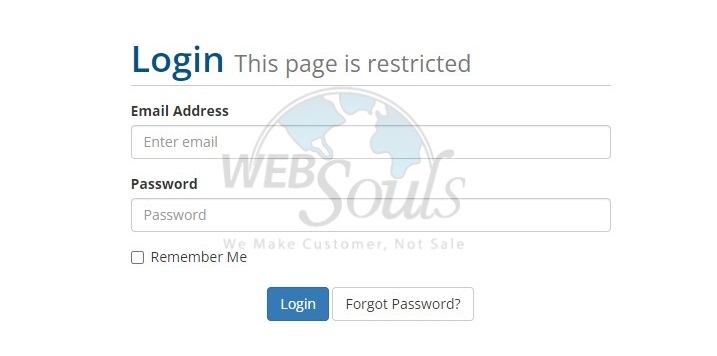
Step 1: Log in to your Client Area Account
To begin the process of disabling auto-renewal for your domain, you'll first need to log in to your Client Area account securely.

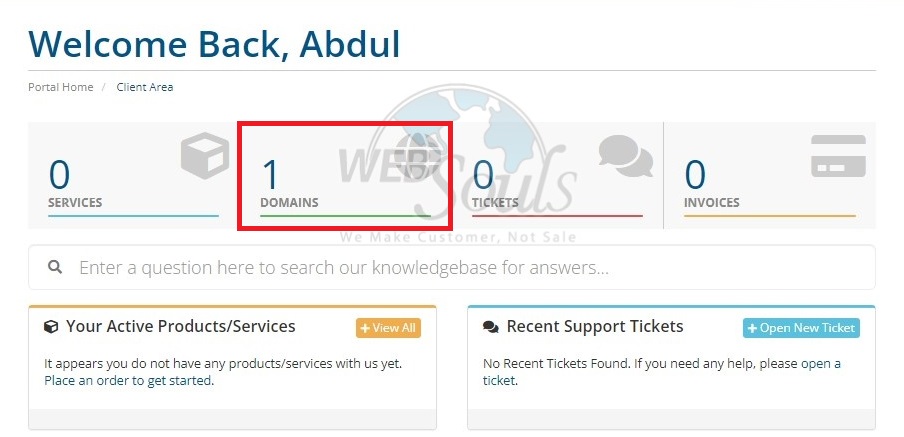
Step 2: Select Domains
Navigate to the "Domains" section, conveniently located adjacent to the "Services" tab in your client area. This is your starting point for managing domain settings effectively.

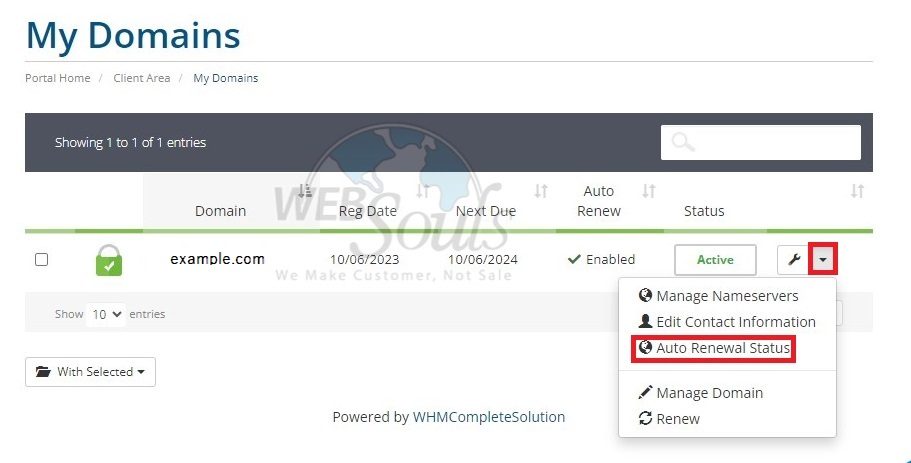
Step 3: Locate the "Auto Renewal Status" Option
Upon accessing your domain management page, you'll find a comprehensive list of all your domain names. To proceed, simply click the dropdown arrow located adjacent to the status of the respective domain on the far right-hand side of your screen. Within the dropdown menu, locate and select the "Auto Renewal Status" option.

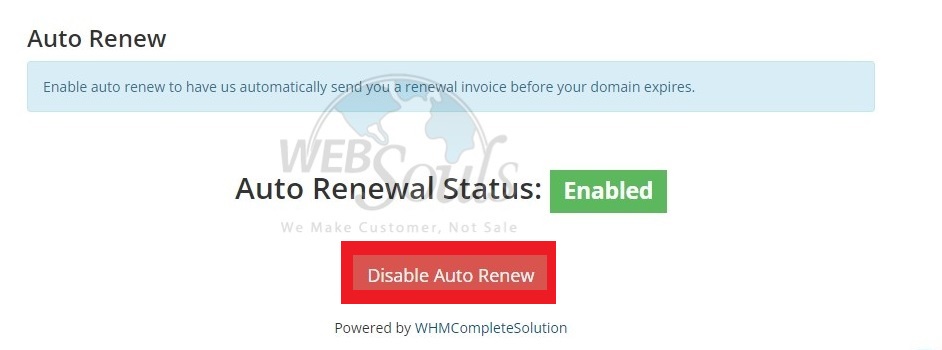
Step 4: Press the Disable Auto Renew Option
From this point, you have the option to enable or disable the auto-renewal feature for your domain name to complete the process.

For further assistance, please get in touch with our customer support team via the live chat option available on our website. We're one of the leading providers of web hosting services in Pakistan and offer the best web hosting with offices located in Lahore and Karachi.

