In this step-by-step guide, we'll walk you through the process of creating an FTP (File Transfer Protocol) account using the Plesk Panel.
FTP accounts play a crucial role in facilitating seamless file transfers between your local machine and the server.
Follow the outlined steps to effortlessly set up an FTP account within the Plesk Panel, empowering you with efficient file management capabilities for your website or server:
Step 1: Login to Plesk
Please input the designated email address and password to access Plesk.

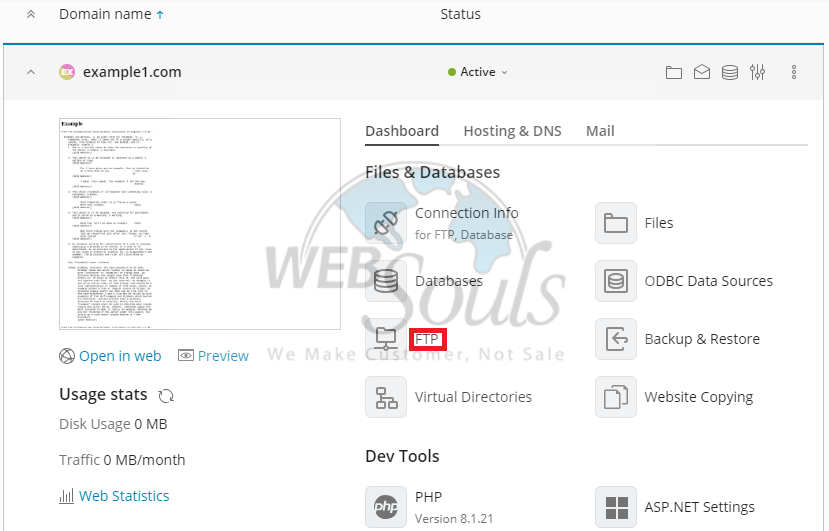
Step 2: Press the FTP Option:
Press the FTP option located within the Files and Databases section under the Dashboard menu.

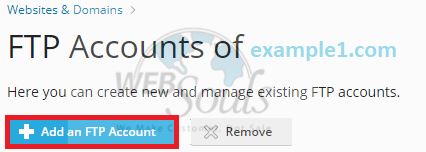
Step 3: Click Add an FTP Account:
Next, click Add an FTP Account to proceed.

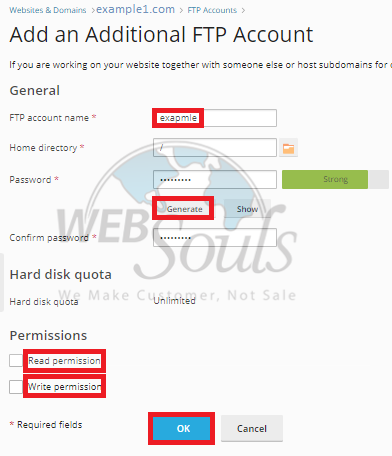
Step 4: Select OK
Now, input your FTP account username and click the "Generate" button to generate the password. Subsequently, choose both Read and Write permissions before selecting the "OK" button to confirm.

Step 5: Process Completion
Finally, your recently established account is now visible within the list of accounts.

Got any questions? Get in touch with us via the live chat option available on our website, or visit us at one of our offices for web hosting in Lahore or Karachi.

