If you find yourself in the position of needing to restore a database in PhpMyAdmin, don't worry - we've got you covered. In this step-by-step guide, we will walk you through the process of restoring your database with ease.
Whether you're a beginner or an experienced user, this guide will provide clear instructions on how to successfully restore your database and get your website back up and running smoothly:
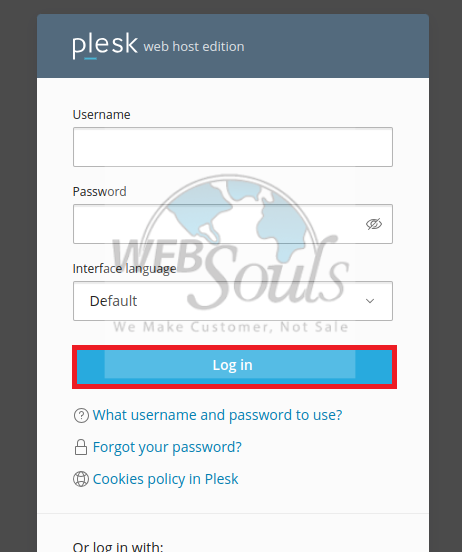
Step 1: Log in to Plesk
Enter your username and account password to login into Plesk. These credentials would have been provided to you by your web hosting company in Pakistan.

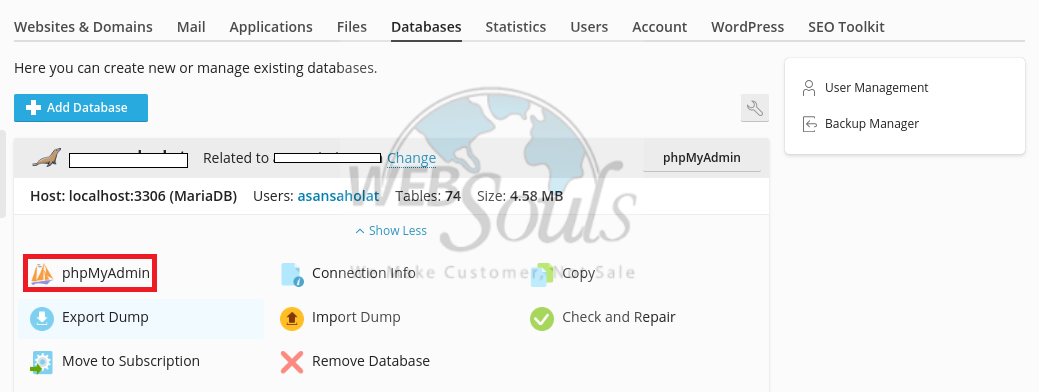
Step 2: Select phpMyAdmin
Navigate to the section designated for databases and select "phpMyAdmin", located adjacent to the "Connection Info".

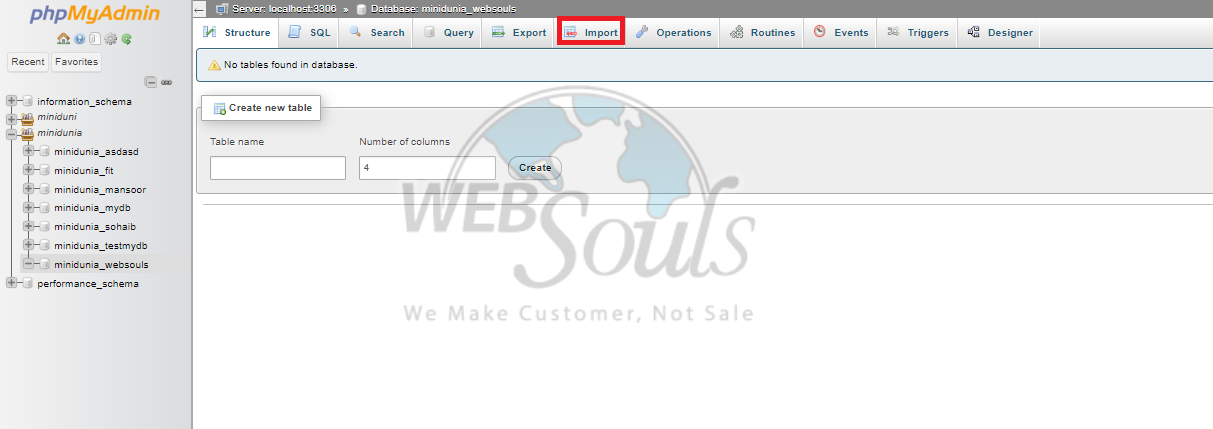
Step 3: Click a Database
To choose the database you're interested in, all you have to do is navigate to the name of that particular database and click on it. For instance, you might be working with a database named "minidunia_websouls". Simply locate this name among the list of databases in your phpMyAdmin interface and proceed by clicking on it to select.

Step 4: Press Import
Next, select the 'Import' option by giving it a click.

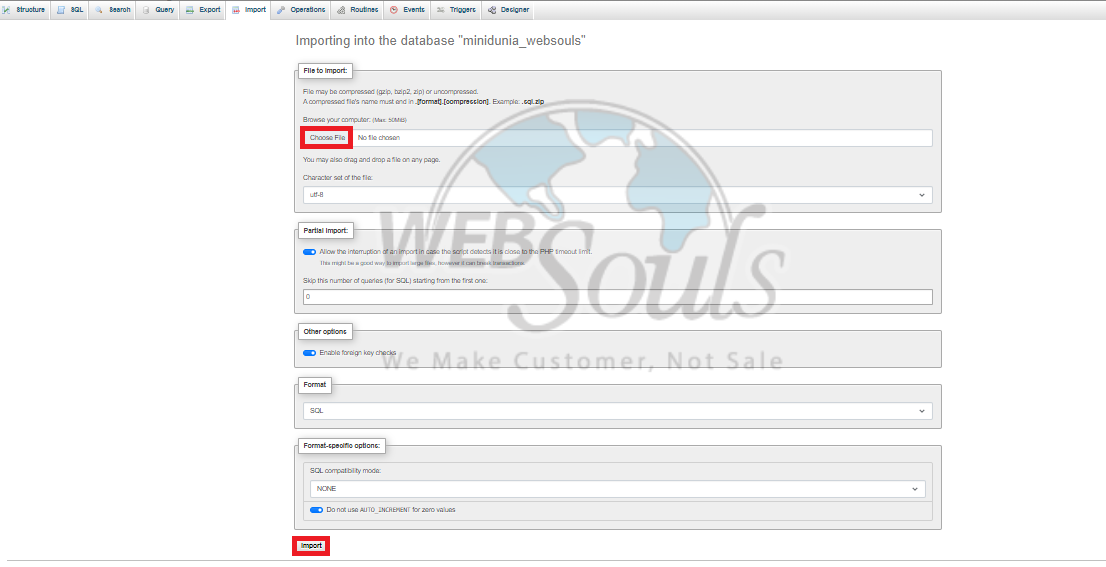
Step 5: Select the Import Button
Navigate to 'Choose File' and find the stored database backup file on your personal computer. Ensure 'SQL' is chosen from the Format dropdown menu. At the page's lower end, select the 'Import' option.

All done! The database would now be restored. In case you have any questions, get in touch with our customer support executives via the live chat option available on our website. Or, you can visit the office of your web hosting services provider.

