Want to know how to set up G Suite email with cPanel?
If yes, then you’re in the right place!
G Suite or Google Apps is a package of the productivity services that are powered by Google, and is undeniably one of the best email services.

Why Should You Set Up G Suite Email with C-Panel?
While it might be convenient to have your email hosted on the same server as your website, we won’t call it a wise choice.
Wondering why you should consider switching to G Suite and how to do it?
Read the steps below, provided by cPanel’s official partner in Pakistan:
- Why Should You Switch to G Suite?
- Steps to Follow Before You Can Switch
- Login to Your cPanel
- Click on “Email Routing”
- Change the Setting to “Automatically Detect Configuration”
- Click “Zone Editor”
- Delete the Existing MX records if Any
- Add New MX Records
- Change Your CNAME Records
- Add an SPF Text Record
- Wait While the Changes Propagate
1. Why Should You Switch to G Suite?
There are many reasons why you should set up G suite Email, including the following:
- Gmail is a highly reliable email service.
- The spam filter technology of Google keeps your inbox neat.
- You may have to face the issue of clogged email queues if your email is on the same server as your website.
- G suite provides you with 30+ GB of storage space.
2. Steps to Follow Before You Can Switch
Before you can set up G suite, you’d need to follow the following steps:
- Sign up for a G Suite account.
- Verify your domain ownership after your account is setup.
- Setup your email addresses in the G Suite admin dashboard.
- Follow the remaining steps provided below by the best Pakistani web hosting company.
So, let’s move on to the steps for managing your email in the G Suite dashboard.
3. Login to Your cPanel
In order to manage your email in G Suite, you’d need to login to your cPanel account at cpanel.your-domain.com or www.your-domain.com/cpanel. Enter the name of your domain in place of your-domain.com.
4. Click on “Email Routing”
Once you have logged in, click on the icon of “Email Routing” that’s under the “Email section. A drop-down menu will appear.
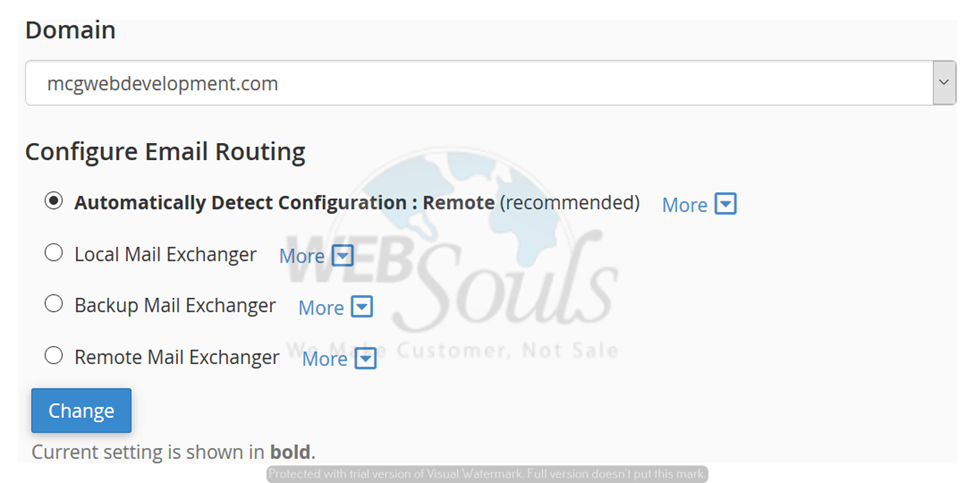
5. Change the Setting to “Automatically Detect Configuration”
In the drop-down menu, change the Email Routing setting by clicking on the “Automatically Detect Configuration” option.
6. Click “Zone Editor”
To set up MX records for G Suite email, click on the “Zone Editor” icon that’s visible under the “Domains” section.
Then move on to select the “Manage” link that you can see across your domain name.
Further on, proceed to select “MX” from the “Filter” menu.
7. Delete the Existing MX records if Any
After you have clicked on “MX” in the “Filter” menu, delete any existing MX records.
This you’d need to do in order to add five other MX records to your DNS zone file.
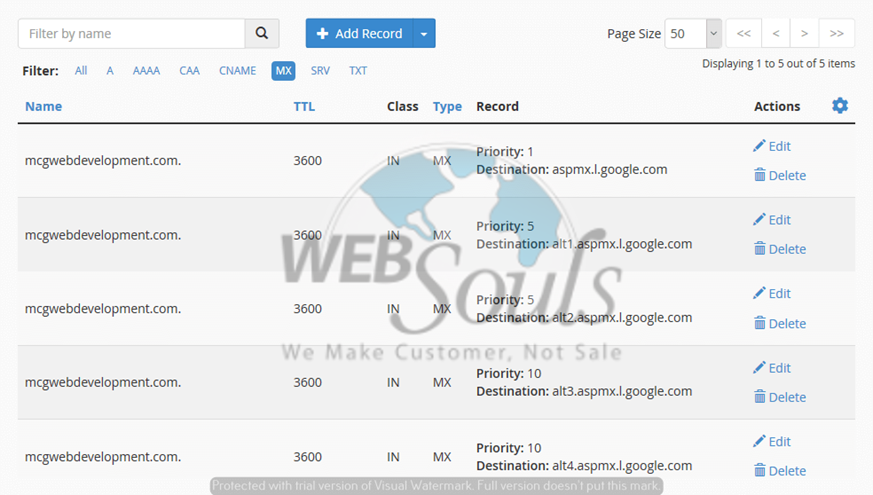
8. Add New MX Records
Are you done with deleting the existing MX records?
Add the following five MX records to your DNS file:
Priority Destination
1 ASPMX.L.GOOGLE.COM.
5 ALT1.ASPMX.L.GOOGLE.COM.
5 ALT2.ASPMX.L.GOOGLE.COM.
10 ALT3.ASPMX.L.GOOGLE.COM.
10 ALT4.ASPMX.L.GOOGLE.COM.
In case you’re still confused about how to set up MX records for G Suite email, you can easily contact a company of Web Hosting Pakistan for further guidance.
9. Change Your CNAME Records
After you’re done with setting up MX records, its time to move on to CNAME and SPF records.
Although your email could be accessed now through https://mail.google.com/a/your-domain.com. You may want to redirect it to https://mail.your-domain.com.
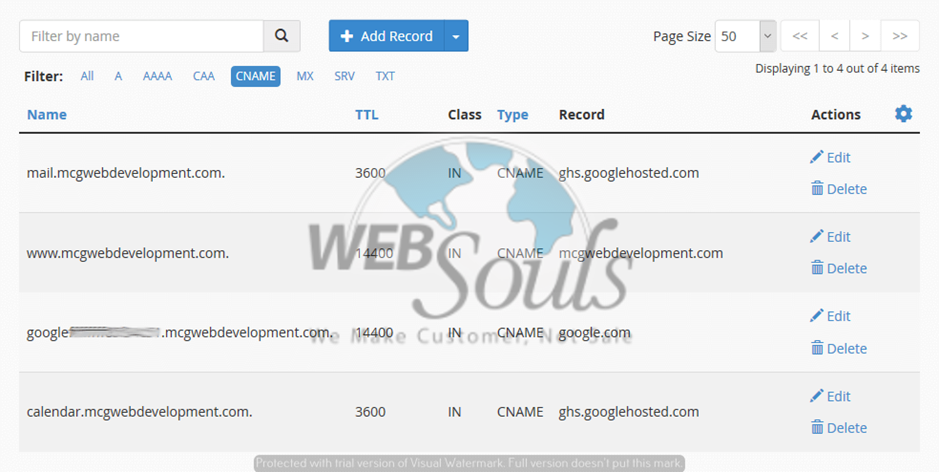
For this, you’d need to change your CNAME records. The steps are as follows:
- In the “Domains” section, click on the “Zone Editor” icon.
- Edit “mail.your-domain.com”, so that it directs to ghs.googlehosted.com.
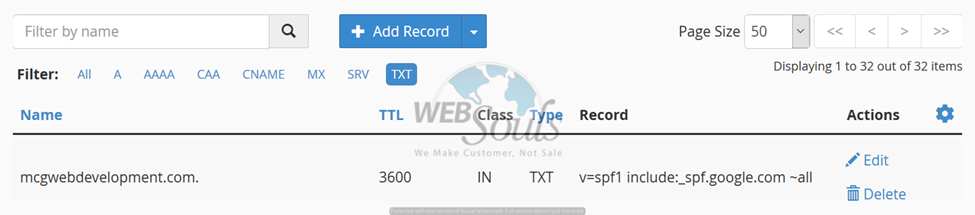
10. Add an SPF TXT Record
After setting up CNAME and MX records, add a SPF TXT record for “your-domain.com”, so that it directs to v=spf1 include: spf.google.com ~all.
Are you confused?
You can contact to WebSouls experts technical engineers and ask them for help!
11. Wait While the Changes Propagate
By now, your work here is almost done. So, all you need to do is just wait up to 48 hours while the changes propagate.
Once the changes have been properly completed, you can further set up your email client (Thunderbird, Outlook, Mail, etc.).
The Gmail IMAP settings are as follows:
IMAP (incoming) mail:
Server: imap.gmail.com
Port: 993
Encryption: SSL
SMTP (outgoing) mail:
Server: smtp.gmail.com
Port: 465 or 587
Encryption: TLS
That was all about how to set up G Suite email with cPanel. In case you have any further question, you can always take help from best Web Hosting Company of Pakistan.
Courtesy
WebSouls - Team Technical Support
