If you’re not taking a regular server backup of all your website’s data, you’re making a huge mistake!
Accidental server breakdowns and data loss are a reality that you can’t possibly ignore, no matter how great and reliable your chosen web hosting company is.
To put it precisely, regular server backups and website maintenance is the difference between a quick recovery after data loss and building your website from scratch all over again.
Many web hosting services providers in Pakistan offer automatic weekly backup and restore service, but if you’ve not purchased a managed web hosting plan, you’d have to take the backups of your server by yourself.
How?
Simply follow the steps below!
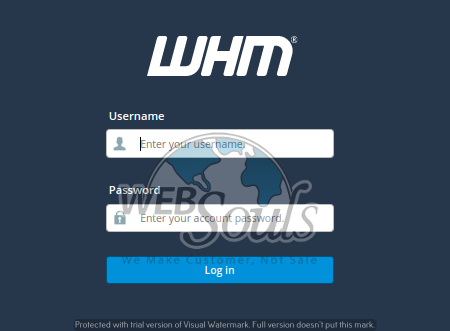
Step 1: Log in to Your WHM Account
To change any settings, such as for enabling the server backup service in your WHM account, you’d first need to log in.
Enter your server’s root credentials provided to you by your chosen website hosting company in Pakistan, and click on the “Log In” button.
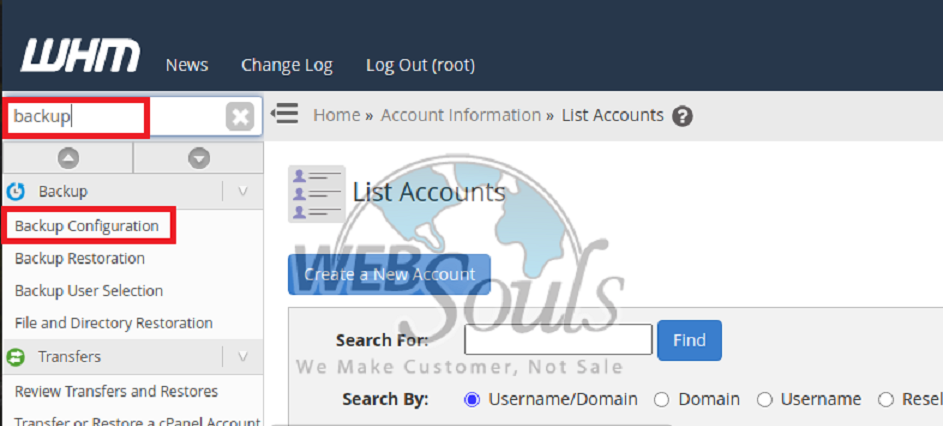
Step 2: Go to the “Backup Configuration” Page
Type in ‘backup’ in the search bar and click on the “Backup Configuration” option under the backup section to go to the “Backup Configuration” page.
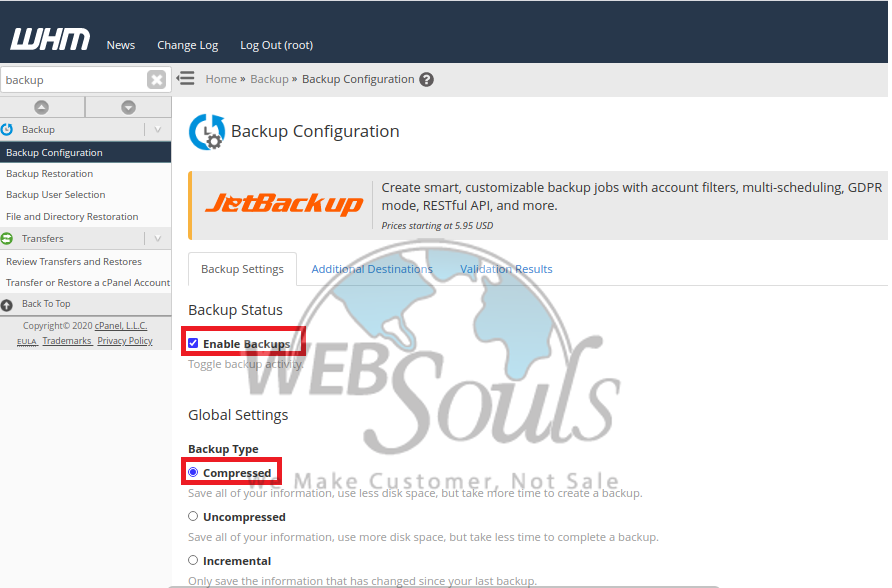
Step 3: Configure Global Settings
Now, to enable the server backup service, turn on the “Enable Backups” option by check-marking the button next to it.
Next up, you’d also need to choose the type of server backup you want to be created.
Following are the three types of backups you can choose from:
Compressed: As the name suggests, these types of backups take up the least amount of disk space on a server. However, one drawback of compressed backups is that they take longer to be completed. The size of a compressed backup file would be from 25% to 75% of the actual account size. For a general estimate, you can keep in mind that a compressed backup would take up about half the disk space as the account itself.
Uncompressed: Since these backups don’t require to be extended from the archive unlike the compressed ones, they complete faster. However, they take up a similar amount of disk space as the hosting account itself.
Incremental: These backups are created either on a daily, weekly, or monthly basis. Any changes to your data would be synchronised each time the backup is created. In terms of the disk space they take, incremental backups are not compressed so they consume the same amount of space as the hosting account.
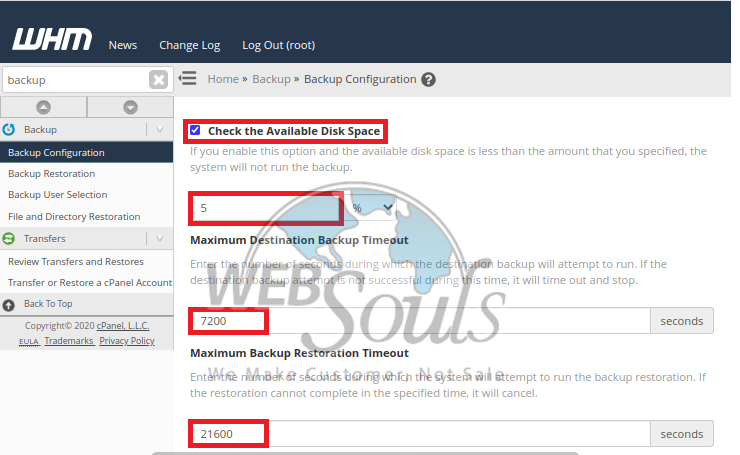
Step 4: Specify the Amount of Available Disk Space
If you want to specify the amount of disk space that should be available in order for the backup to run, enable the “Check the Available Disk Space” option.
Now, enter the specific amount of disk space. Note that the backup will not run if the disk space available is less than the amount you specify.
Next, enter a specific number of seconds under the “Maximum Destination Backup Timeout” option. This is the amount of time during which the destination backup will attempt to run. If the attempts aren’t successful during the specified number of seconds, the backup will time out and stop.
Further, also enter the number of seconds under the “Maximum Backup Restoration Timeout” section. This is the number of seconds during which the system will make an attempt to run backup restoration. If the restoration isn’t completed within the specified amount of time, it will automatically be cancelled.
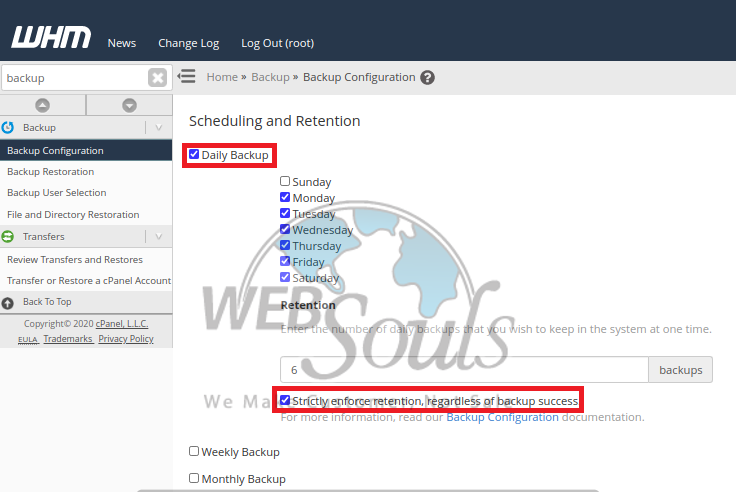
Step 5: Select the Scheduling and Retention Options
In this section, you can either enable or disable daily, weekly, and monthly backups.
For daily and weekly backups, you’d be required to choose the days of the week on which you’d like the backups to be taken.
For monthly backups, you can choose whether you want them to be taken during the beginning of the month, the middle, or both.
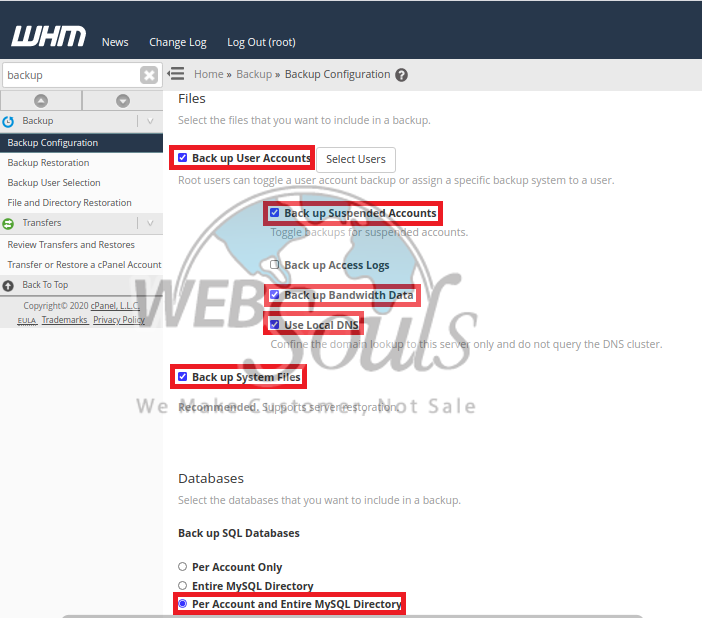
Step 6: Specify the Account Backup Options
In the “Files” section, you can select the account/s for which you want the backups to be taken.
Remember the Server Backup Service was enabled in the Global Settings in Step 3.
Now, you’d have to enable the “Back up User Account” option to assign a backup system to a user.
Select the desired options in this section, including:
- Whether you want to include the suspended user accounts or not
- Whether you wish to back up the system files or not
- The databases that you wish to be included in a backup
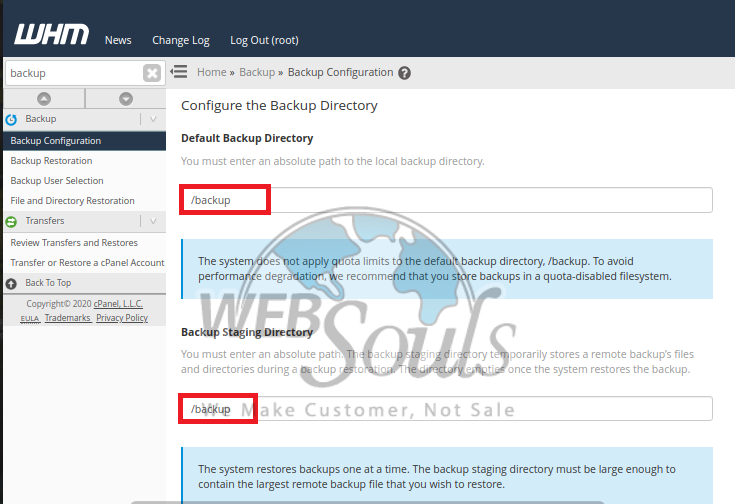
Step 7: Select the Backup Location
In the “Configure the Backup Directory” section, you can choose whether you wish to store the backups locally or externally.
The “Default Backup Directory” is always pre-configured, and in most cases, we’d recommend our clients to not change it.
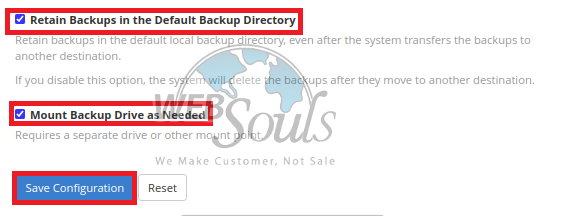
Step 8: Enable the “Retain Backups” Option
If you wish to retain local backups even after you’ve configured the server to transfer backups to an external destination, then checkmark the “Retain Backups in the Default Backup Directory” option.
The “Mount Backup Drive as Needed” option is left unchecked/disabled in most cases. If you wish to enable it, you’d require a separate drive.
Lastly, when you’ve changed the “Configure the Backup Directory” settings as per your needs and requirements, click on the “Save Configuration” button to apply your settings.
In case you still have any confusions, don’t hesitate to get in touch with our technical experts by emailing us at support@websouls.com, or call us at 0321-4776910.
Apart from web hosting, we also provide cheap domain name registration, which means you can easily purchase your ideal web domain from us in Pakistan!
