If you want to stop spam emails from coming into your email account, greylisting is a great way of doing that. With greylisting enabled, your server will automatically block unrecognized senders from filling your email account with spam mails.
Learn how to enable greylisting by following these few easy steps:
Step 1: Log into Your Cpanel Account
Since you’re about to carry out the task of enabling or disabling greylisting using cPanel, you’d have to log into your cPanel account first.

Step 2: Go to “Configure Greylisting”
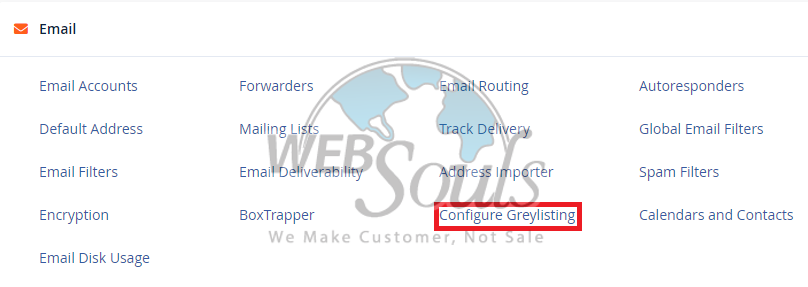
Once in your cPanel account, go to the email settings and click on “Configure Greylisting”. This step would take you to the greylisting settings where you can enable or disable greylisting as per your preference.

Step 3: Enable or Disable Greylisting
After clicking on “Configure Greylisting”, you’d see a screen similar to this:

Here, you can change the settings of greylisting either by turning it on (enable) or off (disable).

Simply choose the option that suits your needs, and you’re done!
If you’re confused, or can’t follow the steps above, contact your web hosting company in Pakistan and their support team will cater to your needs. Or, you may get in touch with our support executives through the live chat option available on our website.

