If a user's NGINX cache is displaying a page that is either inaccurate or out-of-date, you might occasionally need to clear it from cPanel.
To do this, get in touch with your company that offers web hosting in Pakistan for guidance, or simply follow the easy steps below to clear and inactive the NGINX caching:
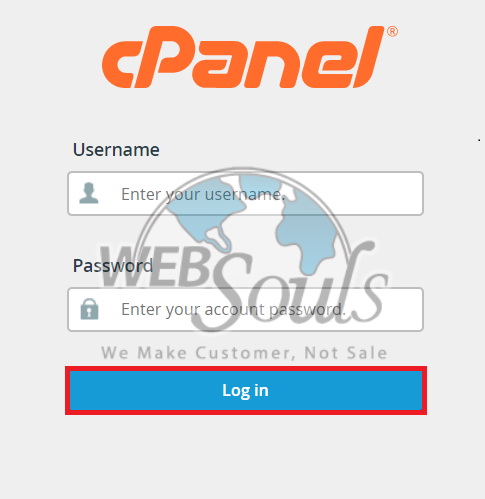
Step 1: Log in to cPanel
Enter your username and account password to login into cPanel.

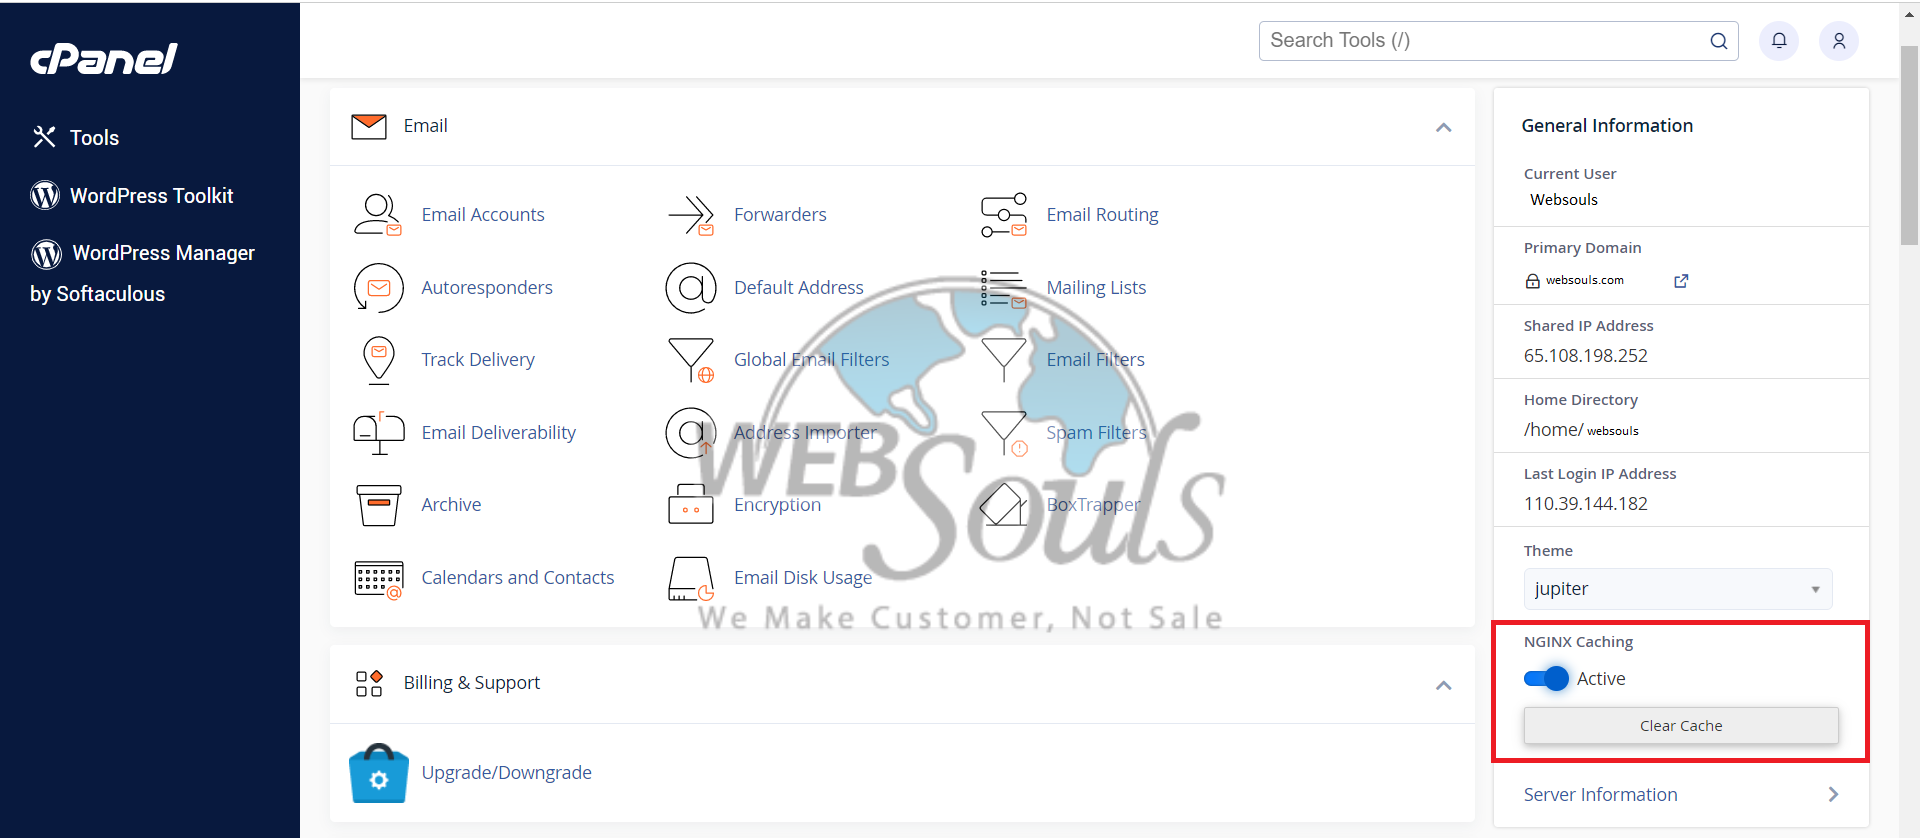
Step 2: Activate the NGINX Caching Option
Look for NGINX Caching, which is right under the general information section on the panel, and then simply click the toggle option to make it active.
You can do this by yourself, with hardly any help from your preferred web hosting company in Pakistan.

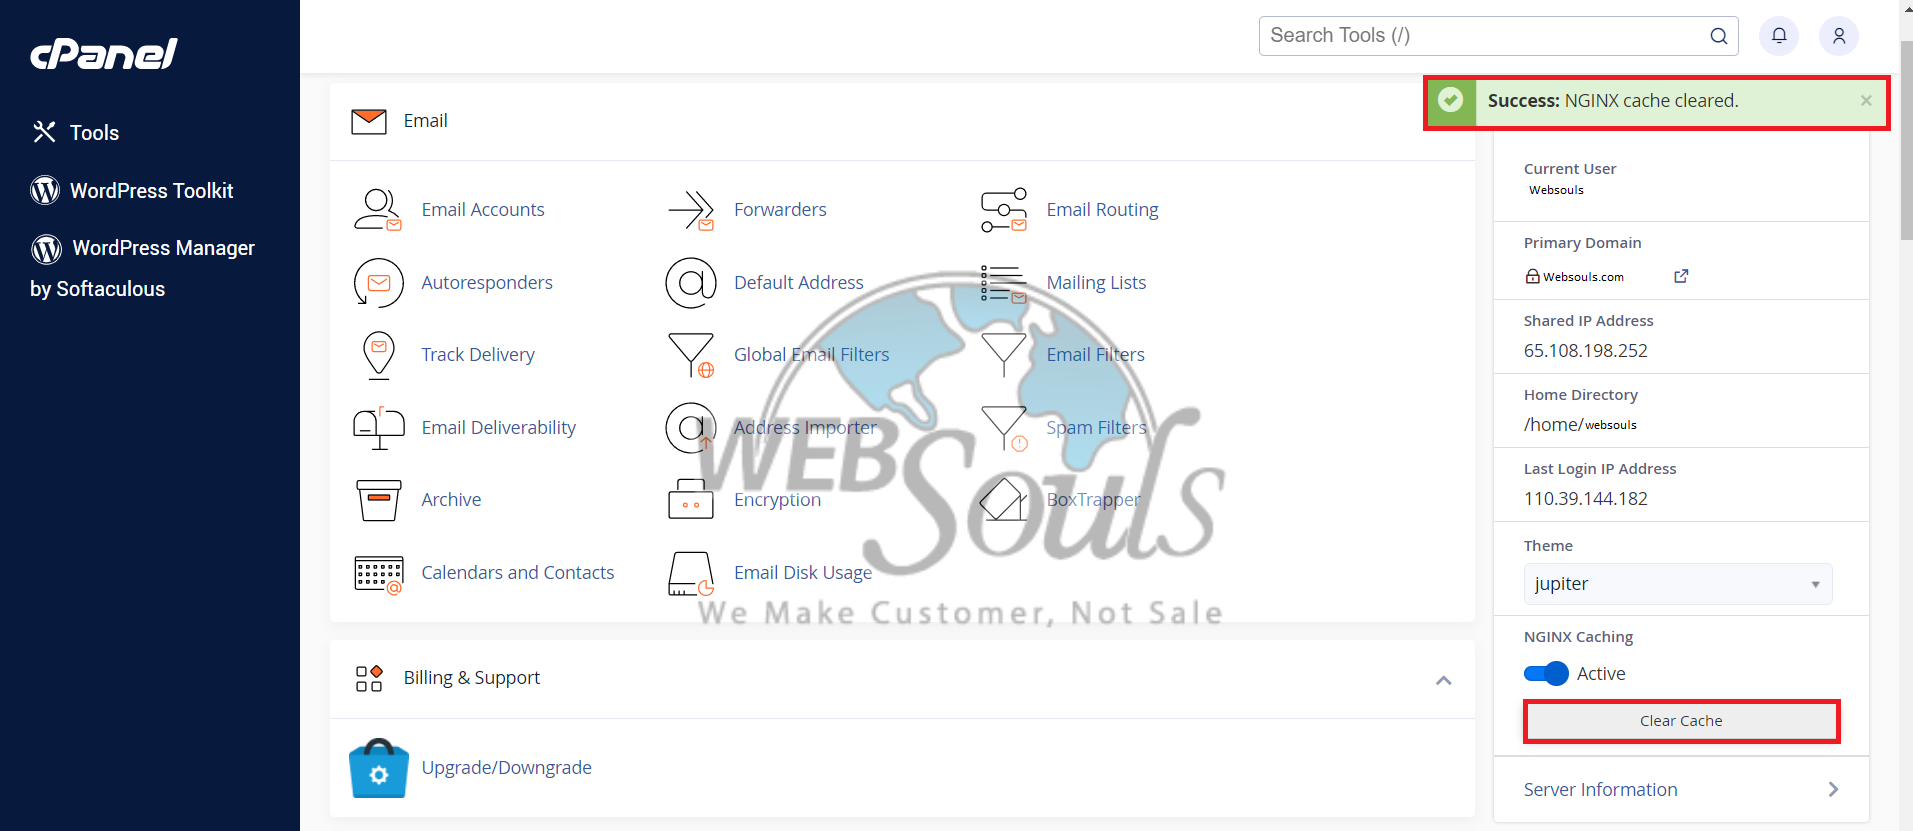
Step 3: Click on the “Clear Cache” Button
After you’ve activated NGINX Caching, there is a button to clear the cache right under the activate option. Click it to clear NGINX Caching and you would see a pop-up on the screen stating that the cache has been successfully cleared.

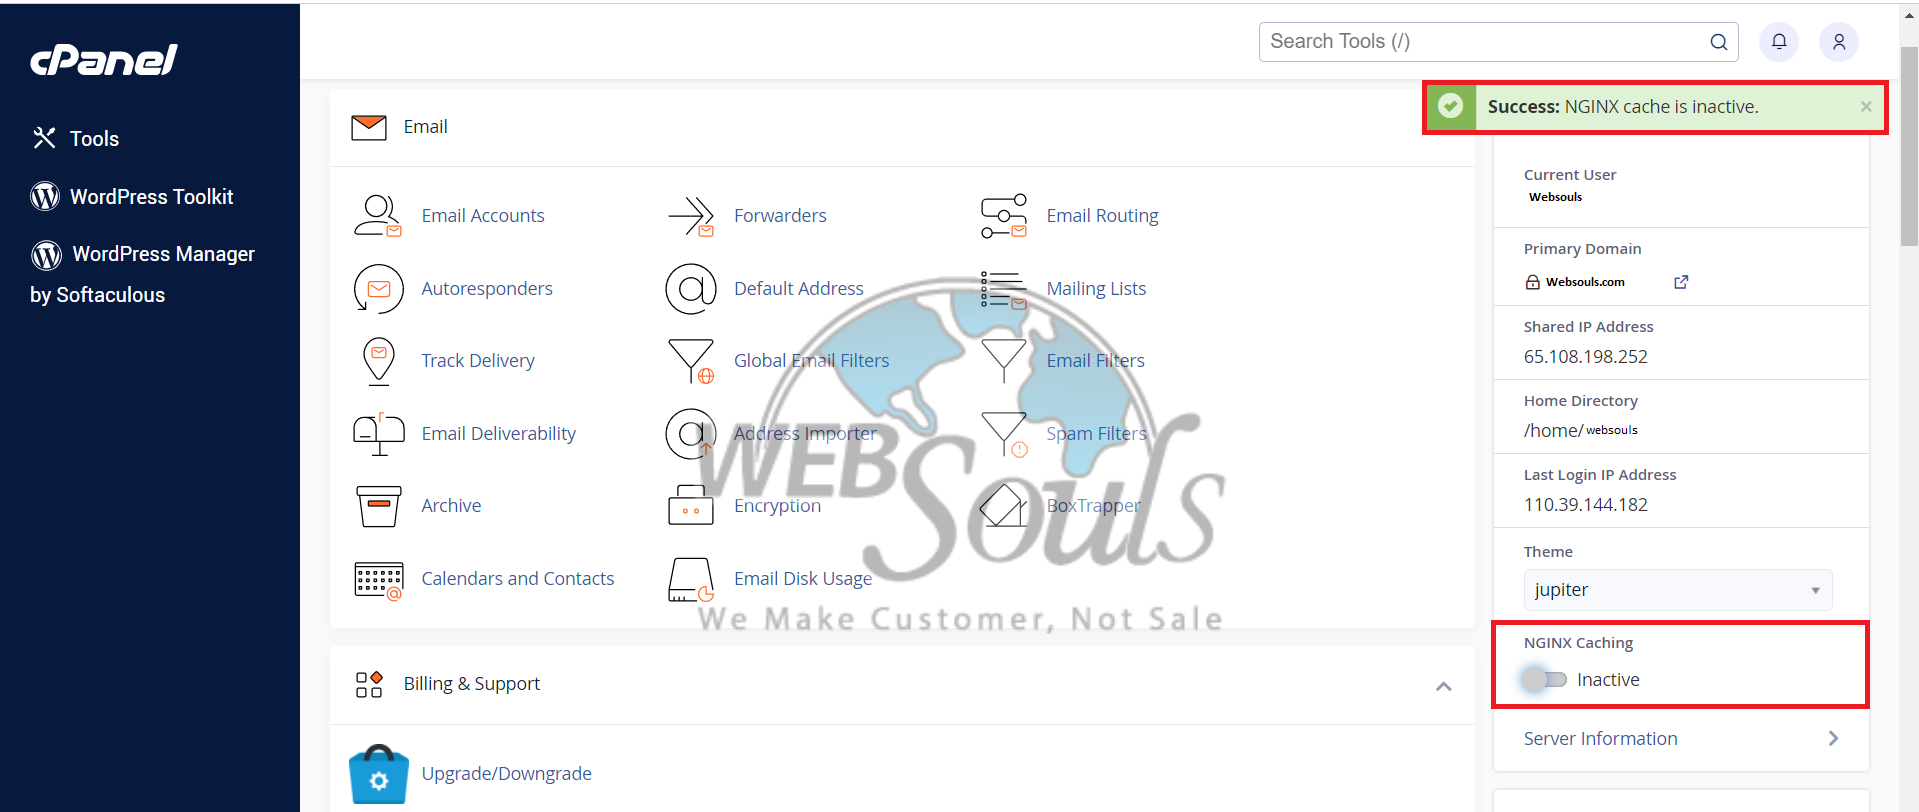
Step 4: Deactivate the NGINX Caching Option
To make the NGINX Caching inactive, click the option again and it’ll show a pop-up confirming that it has been inactivated.

For further assistance, you can visit us at any of our offices. We provide secure and fast web hosting services in Pakistan, with an uptime guarantee of 99.99% and powerful SSD servers.

