Whether you're migrating from another platform or simply need to consolidate your email data, this guide will walk you through the seamless process of importing emails into cPanel.
Follow each step carefully to ensure a smooth transition and uninterrupted communication for your business or personal needs.
Let's dive into the details and streamline your email management experience on cPanel:
Step 1: Login to cPanel
Provide your designated username and password to sign into cPanel.

Step 2: Select Address Importer
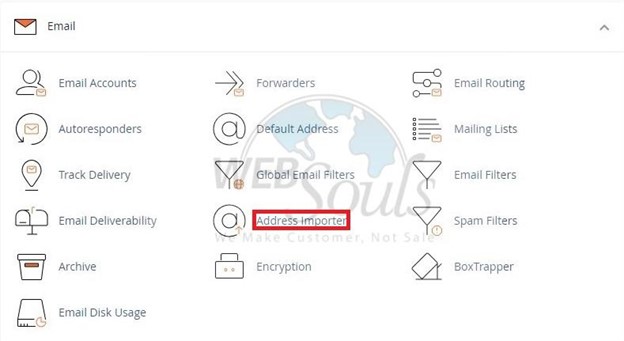
Navigate to the "Email" section and select the "Address Importer" link or icon.

Step 3: See Example Page
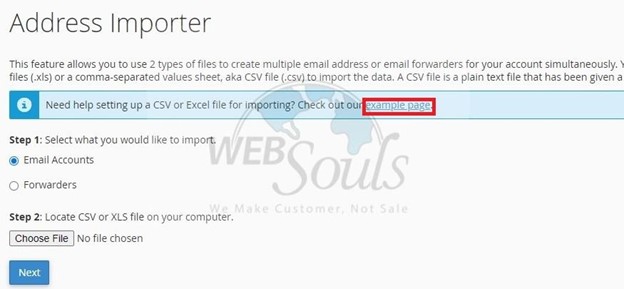
To seek assistance, click on the provided example page and explore its contents.

Step 4: Upload File
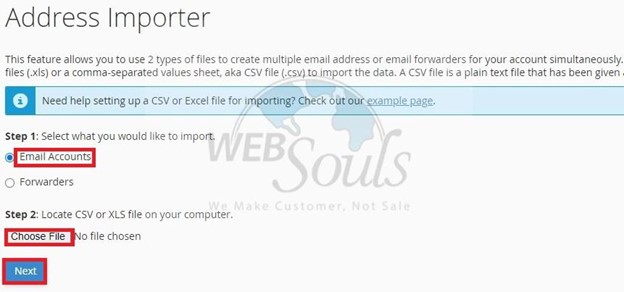
Click on the "Choose File" button to initiate the process. Subsequently, opt for the "Email Accounts" option, and proceed by clicking the "Next" button.

Step 5: Choose Domain
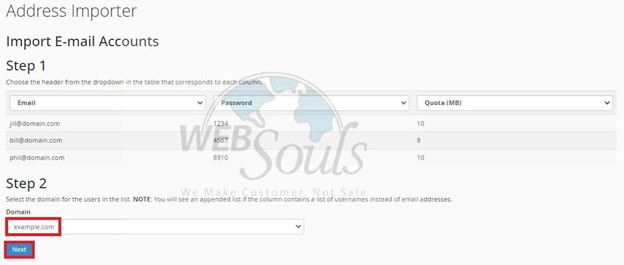
Ensure that the domain selected in the drop-down menu corresponds to the addresses you intend to import if you have multiple domains in cPanel. Proceed by clicking the "Next" button.

Step 6: Press the Finish Option
You will be presented with a final chance to confirm the accuracy of all provided information. If everything is correct, proceed by clicking the "Finish" button. In the event of inaccuracies, click the "Go Back" link located below the list. The import process will continue, and a summary of successfully imported addresses will be displayed.

Got any questions? Get in touch with our customer support team via the live chat option available on our website, or visit us at one of our offices for web hosting in Pakistan.

