In this comprehensive guide, you'll find a hassle-free solution to reset your WordPress password through the WP Toolkit, whether you've forgotten it, faced a security breach, or wish to perform a routine update.
With our easy-to-follow instructions, you'll swiftly regain control of your WordPress site, all without the need to navigate intricate databases or engage in coding complexities.
This user-friendly guide ensures that even beginners can confidently manage their WordPress credentials while enhancing overall site security.
Follow along, and you'll be empowered to take charge of your website's access controls easily:
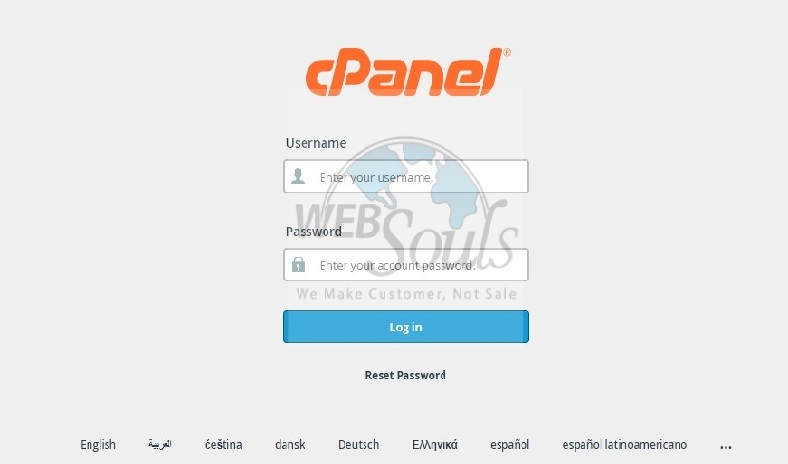
Step 1: Log in to cPanel
Enter your username and account password to login into cPanel.

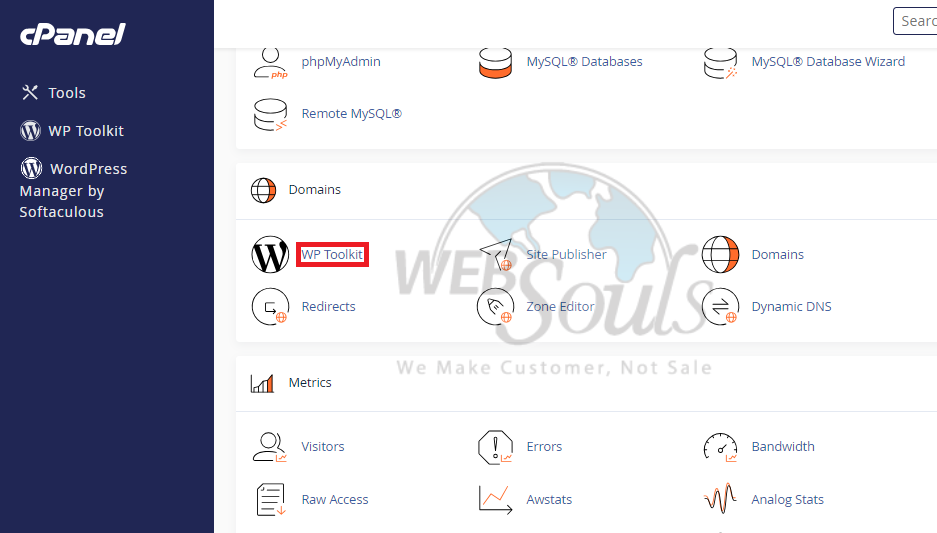
Step 2: Click WP Toolkit
In the designated 'Domains' section of your user interface, start by locating and selecting the very first option, appropriately labeled as 'WP Toolkit.'

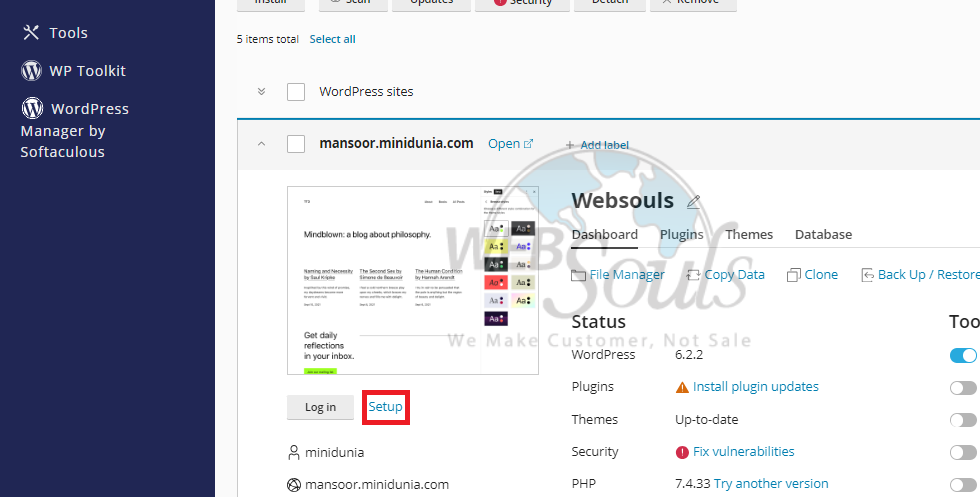
Step 3: Press Setup
Upon reaching the next screen, a variety of information related to WordPress will be displayed. Direct your attention to the left side of the page, just beneath the miniature image or 'thumbnail' of your website, where you'll find a link labeled 'Setup'. For the next step in this process, please proceed by clicking on the 'Setup' link.

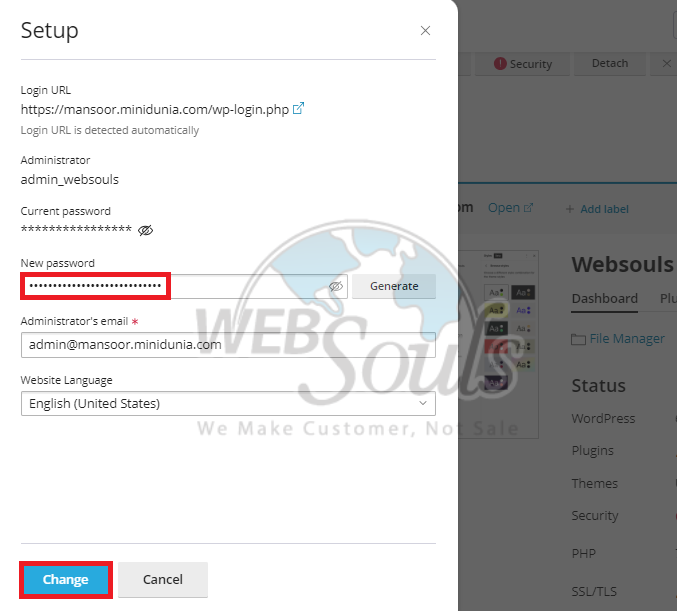
Step 4: Select Change
Upon clicking 'Setup', you will be redirected to a new section that displays your login URL, administrative username, password, and admin email. To set up your new password, locate the 'New password' field and either enter your desired password or opt to click 'Generate' for an automatically created one. To finalize this password update, navigate to the 'Change' button located at the lower part of your screen and click it. Now, your new password is active and ready to use for subsequent logins.

All done! You can contact our support executives in case of any confusion via the live chat option available on our website, or simply visit one of our offices for web hosting in Lahore or Karachi.

